Campfire Cooking – A Pagosa Hint
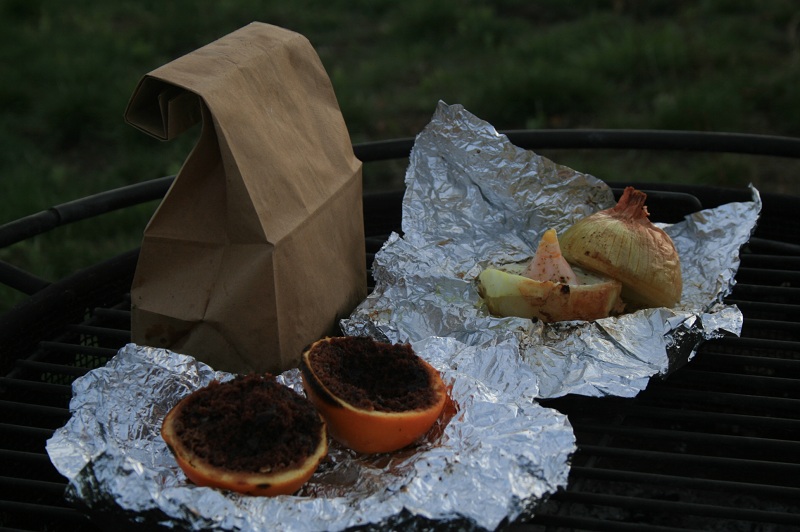
Remember childhood? Then you remember cooking over the campfire. And, you also remember that everything tasted great and was made better by the fact that something got burned, dropped into the ash and was wiped off and eaten. Then, there is the smell of a campfire … soothing and comforting!
As summer is approaching, and camping a favorite summer pastime, it is time to think about campfire cooking. Of course, check out any area regulations before you light a match. And, don’t take the dead, down and dingy (the three D’s) wood from your camp site; the area is probably over picked anyway. On your way to your camp site stop at the camp store and purchase a pre-split stack for a reasonable price.
Most campgrounds have a fire pit; a metal ring with a grate on top, which makes preparing meals a fairly simplified process. Because campfire cooking allows you to use several implements (i.e. sticks, foil, a grill, dutch oven, brown bags or a fry pan) your task is to determine what you want for dinner. To make it easy, we will give you a sample menu tomorrow!
But first, you need to build a campfire for cooking – follow these easy instructions. And, whatever you do, don’t leave your campfire unattended!
GOAL: Have all the wood turn into coals at the same time. This gives an even fire with no flames reaching up to burn food or blacken cookware.
- Select a fire site at least 8-feet from any combustibles. Be sure no tree branches overhang the site;
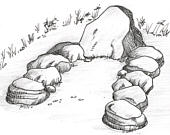
- Use the fire pit established at your campsite or make a U-shaped perimeter using large rocks or banked dirt. A Leave No Trace mound fire or fire pan is the ideal method if there is no established fire pit.
- If breezy, have back of firepit facing the wind; and
- Put a large flat rock at the rear of the firepit to act as a chimney. The “chimney rock” will help direct the smoke up and away.
- Fill the fire area with tinder;
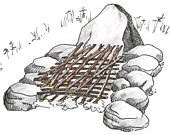
- Lay kindling over tinder in layers, alternating direction with each layer. Use thin splits of wood or small twigs. Do not put kindling down “teepee style.” The entire fire area should be covered with kindling to create a uniform depth for cooking; and
- Have a bucket of water and shovel near the fire area before lighting the fire.
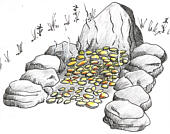 Build the fire; grade the coals
- When kindling is ablaze, add firewood. As much as possible, use wood of the same size; use hardwood or hardwood branches if available. Distribute wood evenly over fire bed;
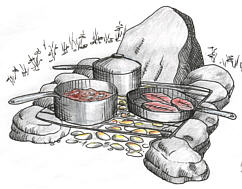
- As soon as the last flames die down leaving mostly white coals, bank the coals into a higher level at the back and lower level at the front. This will give you the equivalent of “High, Medium and Low” cook settings; and
- Remember you are cooking a meal so shooting flames are not your best friend.
- Set the grill on rocks and cook directly on grill or cookware. If cooking directly on the grill keep a small spray bottle handy for shooting down any rogue flames usually caused by food drippings; and
- As the fire diminishes, bank the coals to get the most heat from them.
Now, you have your cook source prepared, and you are keeping an eye on it to ensure no danger. What are you going to prepare? Read part two for suggestions – http://www.pagosa.com/adventureguide/campfire-cooking-pagosa-hint-part-2/.
Outline and drawings borrowed from – http://eartheasy.com/play_campfire_cooking.htm.
About Step Outdoors, LLC
Step Outdoors wants you to go outside and we lead individually inspired one foot in front of the other adventure pursuits to get you there. We tailor a first time overnight backpack or a more challenging multi-day hiking adventure just for you. All adventures take into consideration your goals, fitness and experience level. Perfect for mothers and daughters, couples, families, co-workers or a group of friends, we provide a 100% guarantee of fun.
Check out our blog at http://stepoutdoorscolorado.com/blog/. Or send us an email at info@stepoutdoorscolorado.com.

